This Modeler is packaged in a zip file, which contains two files: setup.exe and a msi file that is a Windows Installer Package. You may download it from https://www.xmodeler.com/.
If you have installed a lower version, remove it before installing this version.
To install the authoring tool, follow the steps below.
In the following sections, we used Windows 10 and Mozilla Firefox Version 46.0.1 as an internet browser to download the package of NSS Web3d Modeler. Other browsers, Internet Explorer, Microsoft Edge and Google Chrome, have similar procedures when they are used to download this package.
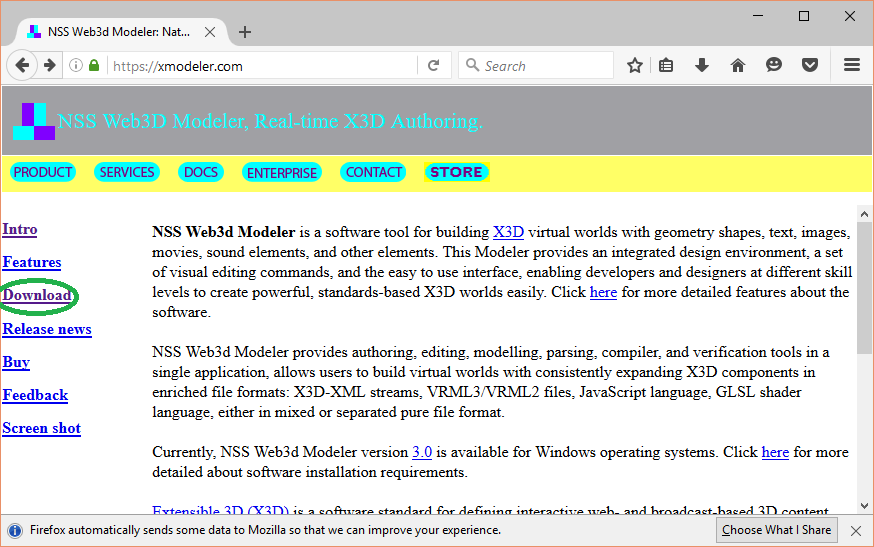
Visit xModeler.com. The webpage has a Download linkage on the left side. See figure 1.
Figure 1 xModeler.com
After clicking the Download linkage, you will see another page, which has a word here referring to the xModeler.50.zip. See figure 2.
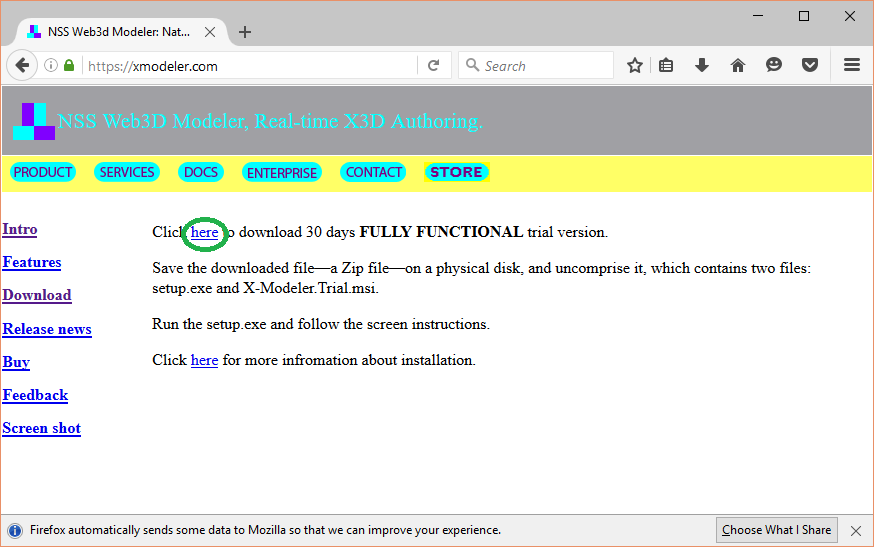
Figure 2 The here linkage
After you click the above linkage, Firefox pops up a window, like figure 3. Please choose Save File.
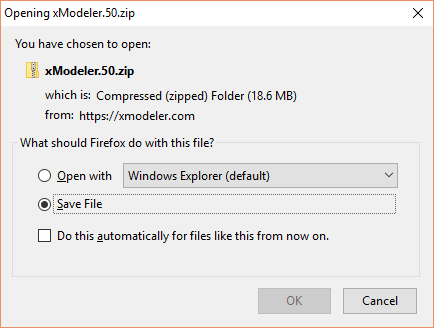
Figure 3 The Opening window
Click the ongoing downloads button of the Firefox browser, which looks like an arrow down symbol, located at the top right corner of the browser, the browser will display the just downloaded file: xModeler.50.zip.
Click the file name, the browser will pop up a window containing two file names: setup.exe and Setup.Trial.msi. See figure 4.
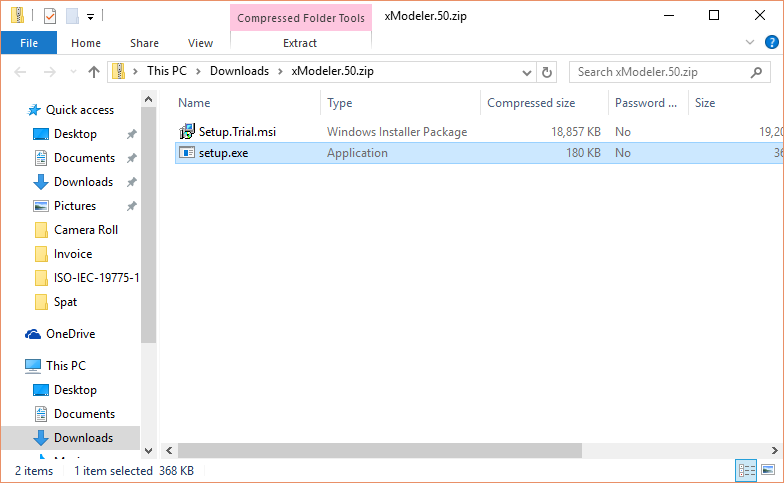
Figure 4 setup.exe and Setup.Trial.msi
Click one of the file names, Windows installer will pop up a Welcome box. Figure 5 shows the window image.

Figure 5 Welcome to NSS Web3 Modeler window
Click the next button, the installer will show you END USER LICENSE AGREEMENT. Please read it. If you agree, click the I Agree button.

Figure 6 END USER LICENSE AGREEMENT window
Click the next button, the installer goes to Select Installation Folder which allows the user to choose a folder for installing NSS Web3d Modeler. If the user clicks Browser... button, the installer pops up a window Browse for Folder that lets the user select or create a folder.
When the user clicks Dist Cost... button, the installer pops up a window showing how much free disk space is required for installing NSS Web3d Modeler.
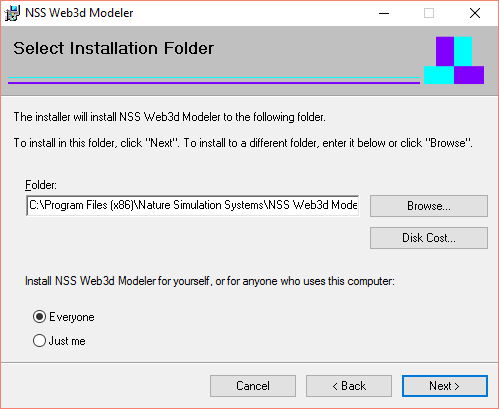
Figure 7 Select Installation Folder window
When the user clicks the next button, the installer goes to Confirm Installation. If the user clicks the next button, the installer will extract compressed files and write them to local disk.
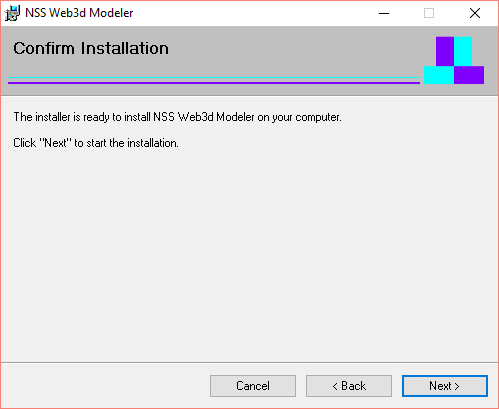
Figure 8 Confirm window
After the user clicks the next button, the installer goes to Customer Information, which allows the user to input name, organization and serial numbers.
When you face the following dialog, if you have a serial number, input it or click the next button to continue to install a 30-day trial version.

Figure 9 The Serial Number dialog
This application has a menu item Activation, see image 12. To input a serial number during the trial period, use this command. After the trial period, to input the number, press the Try button when the application starts.

Figure 10 The Activation menu item
After the user clicks the next button, the installer pops up a User Account Control window, which asks "Do you want to allow this app to install on your PC?". That window also shows you the Verified publisher: Nature Simulation Systems Inc., and the "File origin".

Figure 11 The User Account Control window
After the user clicks the Yes button, the Installation Complete window pops up. Click Close to finish the installation.

Figure 12 The Complete window
To delete the tool, follow the steps below.